Create a Docker image running Robot Framework
Robot Framework is easy enough to set up.
When you have Python installed on your system, it can be as easy as running pip install robotframework &&
pip install robotframework-appiumlibrary.
This is not how I want to do it.
For this intro, I want to run the Robot Framework in a Docker image.
Intro
Robot Framework is a generic open source automation framework. It can be used for robotic process automation (RPA), and also for acceptance level testing and acceptance test-driven development (ATDD). In this blog I want to focus on the first steps to start working with it.
Docker
As stated in the intro, I don’t want Robot Framework running directly on my machine, but instead have it installed on a Docker image. This makes it portable, and you are able to use it anywhere you want. So let us make our Dockerfile:
Installation
Build the image with:
docker build -f ./Dockerfile -t robot .
Do not forget the dot at the end of the line!
The dot means that Docker uses the Dockerfile in the local (current) folder.
###
# To manually start your image:
# Make sure you create the folders suites, scrips and reports
# docker run --rm -ti --network=host -v "$PWD/output:/output" -v "$PWD/suites:/suites" -v "$PWD/scripts:/scripts" -v "$PWD/reports:/reports"  robot  bash
#
# Or using docer-compose (see listing below):
# docker-compose up
# docker-compose down
###

FROM python:3.10.0a6-buster

LABEL name="Docker build demo Robot Framework"

MAINTAINER "JDriven" <info@jdriven.com>

RUN apt-get update \
    && apt-get install -y xvfb wget ca-certificates fonts-liberation libasound2 libatk-bridge2.0-0 libatk1.0-0 \
       libatspi2.0-0 libcups2 libdbus-1-3 libgbm1 libgtk-3-0 libnspr4 libnss3 \
       libxcomposite1 libxkbcommon0 libxrandr2 xdg-utils ntpdate openssl

RUN python3 -m pip install robotframework && pip install robotframework-requests &&  pip install robotframework-selenium2library \
    && pip install xvfbwrapper && pip install robotframework-xvfb && pip install certifi && pip install asn1crypto \
    && pip install bcrypt && pip install robotframework-sshlibrary && pip install cryptography && pip install pyOpenSSL \
    && pip install idna && pip install requests[security]

# install chrome and chromedriver in one run command to clear build caches for new versions (both version need to match)
RUN wget -q https://dl.google.com/linux/direct/google-chrome-stable_current_amd64.deb \
    && dpkg -i google-chrome*.deb \
    && rm google-chrome*.deb \
    && wget -q https://chromedriver.storage.googleapis.com/89.0.4389.23/chromedriver_linux64.zip \
    && unzip chromedriver_linux64.zip \
    && rm chromedriver_linux64.zip \
    && mv chromedriver /usr/local/bin \
    && chmod +x /usr/local/bin/chromedriver

CMD ["/scripts/run_suite.sh"]
And don’t forget to add the 'docker-compose.yml' file:
version: '3.3'
services:
    test:
        network_mode: host
        image: robot
        shm_size: "256M"
        environment:
            USERNAME: Justus
        volumes: [
           "$PWD/suites:/suites",
           "$PWD/scripts:/scripts",
           "$PWD/reports:/reports"
        ]
Folders
We need to create three folders where the following content is stored:
-
suites : The Robot Framework test scripts
-
scripts: Contains the script that runs the Robot Framework test scripts on starting up the image
-
reports: Contains the reports (test results) after running the test-scripts
Since these folders are on your local (host) machine, you don’t have to connect to a shell on the docker image to read the results. Also, it’s easy to manage your test-scripts, while the Robot Framework is running on the Docker image.
In the folder 'scripts' generate an executable (chmod +x run_suite.sh) file called run_suite.sh
#!/usr/bin/env bash
set -e

# Run an individual test suite if the TEST_SUITE environmental variable is set.
if [ -z "$TEST_SUITE" ]; then
    TEST_SUITE=""
fi

CMD="robot --console verbose --outputdir /reports /suites/$TEST_SUITE"

echo ${CMD}

``${CMD}``
Test suite
Assuming you know how to create your test-sctips, let’s add a simple script as a reference in the suites folder.
*** Settings ***
Library  Collections
Library  RequestsLibrary

Suite Teardown  Delete All Sessions

*** Test Cases ***
Get Request TestWebsite
    Create Session  getwebsite        https://www.jdriven.com    verify=false
    ${resp}=        GET On Session  getwebsite  /       expected_status=200
    Should Be Equal As Strings      ${resp.status_code}     200
When you run docker-compose up, the test should just run.
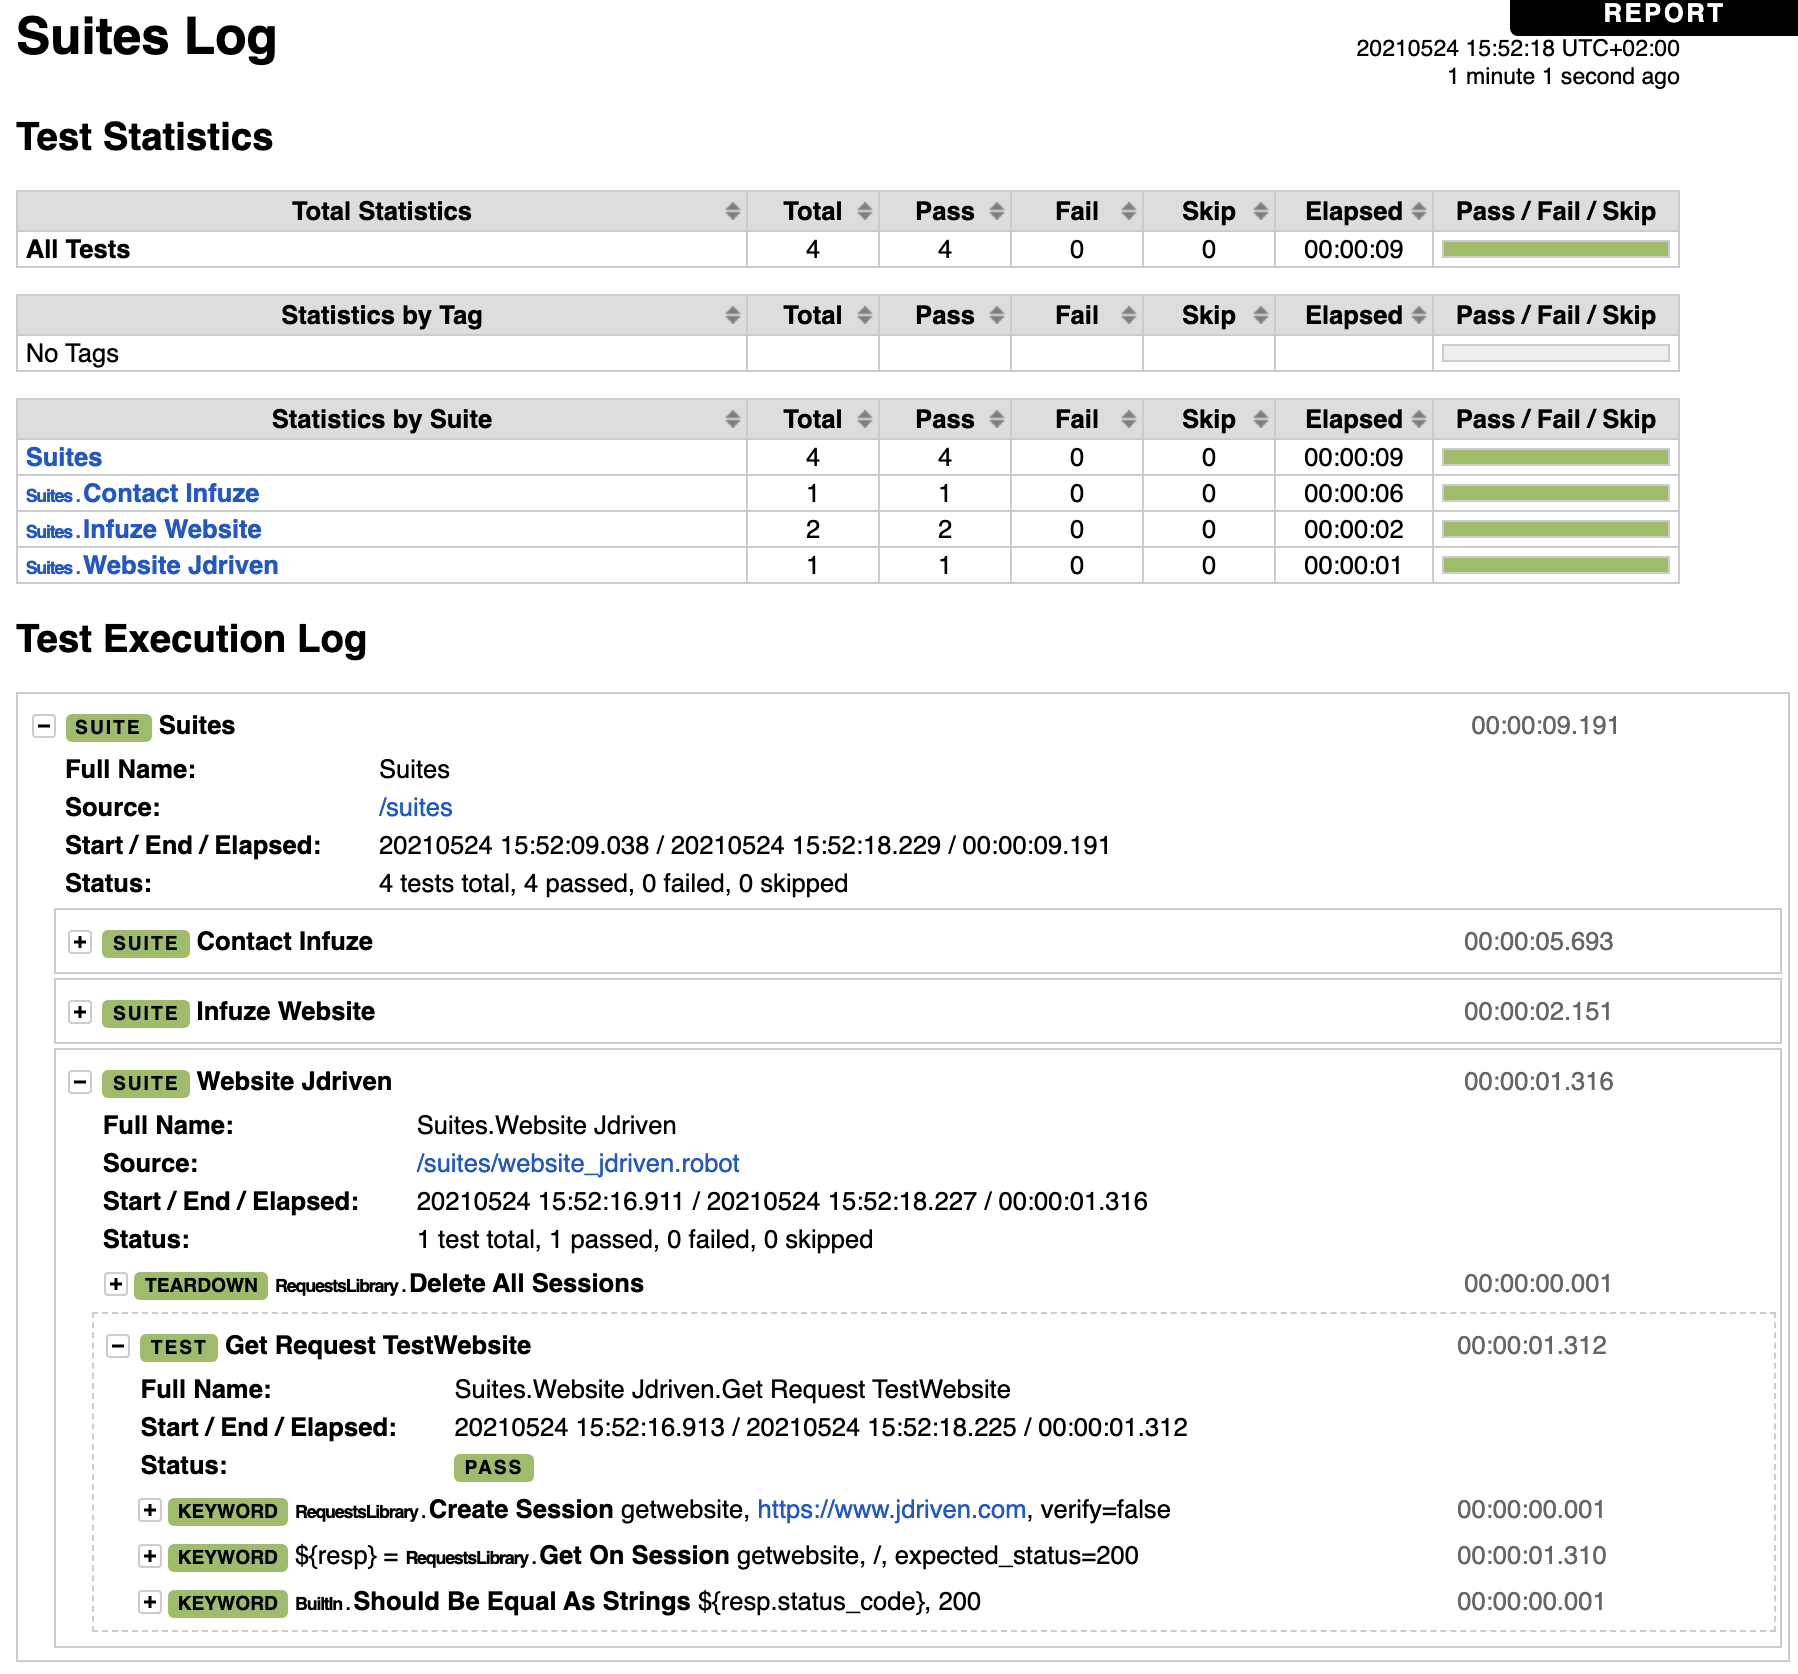
Open the reports/report.html using your browser to dive into your test results: