Stateless Spring Security Part 3: JWT + Social Authentication
This third and final part in my Stateless Spring Security series is about mixing previous post about JWT token based authentication with spring-social-security. This post directly builds upon it and focusses mostly on the changed parts. The idea is to substitude the username/password based login with "Login with Facebook" functionality based on OAuth 2, but still use the same token based authentication after that.
Login flow
Client-side
The user clicks on the "Login with Facebook" button which is a simple link to "/auth/facebook", the SocialAuthenticationFilter notices the lack of additional query parameters and triggers a redirect leading the user of your site to Facebook. They login with their username/password and are redirected back, again to "/auth/facebook" but this time with "?code=...&state=..." parameters specified. (If the user previously logged in at facebook and had a cookie set, facebook will even instantly redirect back and no facebook screen is shown at all to the user.) The fun part is that you can follow this in a browsers network log as it's all done using plain HTTP 302 redirects. (The "Location" header in the HTTP response is used to tell the browser where to go next)
Server-side
After the redirect from facebook to "/auth/facebook?code=...&state=..." the SocialAuthenticationFilter now sees the proper parameters and will trigger two server calls to facebook. The first is to acquire an Access Token for the logged in user, the second is test if the whole process was succesful by acquiring user details using the access token. After this is all done the user is considered to be logged in and he can be redirected back to the root of the application using yet another 302 redirect (to "/").
Some words on Spring Social
Spring Social is a complete framework for dealing with social networks and has a scope far beyond a mere login scenario. Apart from the different social network adapters, there is also a small integration library called Spring Social Security that implements the social authentication use-cases in such a way that it integrates better with Spring Security. It comes with an SocialAuthenticationFilter that maps to "/auth", this is what we'll use. So setting up social authentication requires configuring Spring Social itself as well as Spring Security using the neat little Spring Social Security library.
Spring Social
Configuring it basically involves extending the SocialConfigurerAdapter. First you tell it what social networks to support:
@Override
public void addConnectionFactories(ConnectionFactoryConfigurer cfConfig, Environment env) {
    cfConfig.addConnectionFactory(new FacebookConnectionFactory(
            env.getProperty("facebook.appKey"),
            env.getProperty("facebook.appSecret")));
}
It also needs to know how to acquire the user id for current user:
@Override
public UserIdSource getUserIdSource() {
    //retrieve the UserId from the UserAuthentication in security context
    return new UserAuthenticationUserIdSource();
}
Finally it needs a UsersConnectionRepository. Which is basically in charge of the relation between a user and his connections to a social network. Spring Social comes with two implementations of its own (jdbc or in-memory). I choose to roll my own as I wanted to re-use my Spring Data JPA based UserDetailsService.
@Override
public UsersConnectionRepository getUsersConnectionRepository(ConnectionFactoryLocator connectionFactoryLocator) {
    SimpleUsersConnectionRepository usersConnectionRepository =
            new SimpleUsersConnectionRepository(userService, connectionFactoryLocator);

    // if no local user record exists yet for a facebook's user id
    // automatically create a User and add it to the database
    usersConnectionRepository.setConnectionSignUp(autoSignUpHandler);

    return usersConnectionRepository;
}
Spring Security
As in last blog post, configuring it basically involves extending the WebSecurityConfigurerAdapter. Apart from the usual stuff like configuring and exposing an AuthenticationManager and UserDetailsService, it now needs to configure and plug-in the SocialAuthenticationFilter. This basically involves very little code as the SpringSocialConfigurer does most of the work. It could be as simple as:
@Override
protected void configure(HttpSecurity http) throws Exception {
    // apply the configuration from the socialConfigurer
    // (adds the SocialAuthenticationFilter)
    http.apply(new SpringSocialConfigurer());
}
Considering I wanted to plug-in the Token based authentication, my own succesHandler and userIdSource; I had to make some configuration changes:
@Autowired private SocialAuthenticationSuccessHandler successHandler;
@Autowired private StatelessAuthenticationFilter jwtFilter;
@Autowired private UserIdSource userIdSource;

@Override
protected void configure(HttpSecurity http) throws Exception {

// Set a custom successHandler on the SocialAuthenticationFilter (saf)
final SpringSocialConfigurer sc = new SpringSocialConfigurer();
sc.addObjectPostProcessor(new ObjectPostProcessor<...>() {
    @Override
    public <...> O postProcess(O saf) {
        saf.setAuthenticationSuccessHandler(successHandler);
        return saf;
    }
});

http.

...

// add custom authentication filter for stateless JWT based authentication
.addFilterBefore(jwtFilter, AbstractPreAuthenticatedProcessingFilter.class)

// apply the configuration from the SocialConfigurer
.apply(sc.userIdSource(userIdSource));
}
If you wanted to you could also subclass the SpringSocialConfigurer and provide a more elegant setter for a custom successHandler...
Past the Boilerplate (kudos to you for making it here)
It's now time to focus on some of the more interesting bits. Right after an initial successful connection to facebook is established a custom ConnectionSignUp is triggered:
@Override
@Transactional
public String execute(final Connection<?> connection) {
    //add new users to the db with its default roles
    final User user = new User();
    final String firstName = connection.fetchUserProfile().getFirstName();
    user.setUsername(generateUniqueUserName(firstName));
    user.setProviderId(connection.getKey().getProviderId());
    user.setProviderUserId(connection.getKey().getProviderUserId());
    user.setAccessToken(connection.createData().getAccessToken());
    grantRoles(user);
    userRepository.save(user);
    return user.getUserId();
}
As you can see my version simply persists the user with its connection data as a single JPA object. Purposely supporting only one-to-one relations between a user and an identity on facebook. Note that I ended up excluding the connection properties from the actual token generated from the user. Just like I previously excluded the password field (which is no longer part of the User object at all):
@JsonIgnore
private String accessToken;
Going this route does mean that any call to the facebook API needs a database query for the additional connection fields. More on this later on. Right after the user is authenticated the custom AuthenticationSuccessHandler is triggered:
@Override
public void onAuthenticationSuccess(HttpServletRequest request, HttpServletResponse response, Authentication auth) {

    // Lookup the complete User object from the database
    final User user = userService.loadUserByUsername(auth.getName());

    // Add UserAuthentication to the response
    final UserAuthentication ua = new UserAuthentication(user);
    tokenAuthenticationService.addAuthentication(response, ua);
    super.onAuthenticationSuccess(request, response, auth);
}
This looks a lot like the code from previous blog post but I had to make some changes in the TokenAuthenticationService. Because the client is loaded after a redirect, to preserve the token on the client-side until then, it must be send to client as a cookie:
public void addAuthentication(HttpServletResponse response, UserAuthentication authentication) {
  final User user = authentication.getDetails();
  user.setExpires(System.currentTimeMillis() + TEN\_DAYS);
  final String token = tokenHandler.createTokenForUser(user);

  // Put the token into a cookie because the client can't capture response
  // headers of redirects / full page reloads.
  // (this response triggers a redirect back to "/")
  response.addCookie(createCookieForToken(token));
}
This ends up being part of the final redirect response looking like this: [caption id="attachment_2463" align="alignnone" width="717"]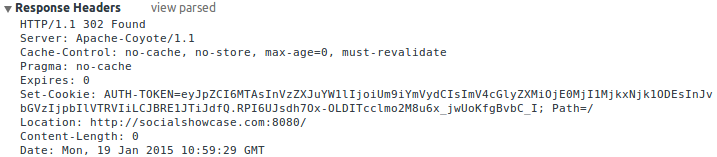 The final redirect back to the client after succesful login[/caption] The last and best part is of course where all code comes together to form a pretty sweet API. Because Spring Social already takes care of creating a user specific request-scoped ConnectionRepository, a connection specific API of it can be created by adding the following bean code to the SocialConfigurerAdapter:
@Bean
@Scope(value = "request", proxyMode = ScopedProxyMode.INTERFACES)
public Facebook facebook(ConnectionRepository repo) {
Connection<Facebook> connection = repo.findPrimaryConnection(Facebook.class);
    return connection != null ? connection.getApi() : null;
}
This user specific facebook bean can be used in a controller like so:
@Autowired
Facebook facebook;

@RequestMapping(value = "/api/facebook/details", method = RequestMethod.GET)
public FacebookProfile getSocialDetails() {
    return facebook.userOperations().getUserProfile();
}
client-side implementation
As mentioned the token is now passed to the client as a Cookie. However just like previous time, the server-side still only accepts tokens send into a special HTTP header. Granted that this is pretty arbitrary and you could have it simply accept the cookie. I prefer it not to as it prevents CSRF attacks. (Because the browser can't be instructed to automatically add the proper authentication token to a request.) So before retrieving the current user details the init method of the front-end now first tries to move the cookie to local storage:
$scope.init = function () {
    var authCookie = $cookies\['AUTH-TOKEN'\];
    if (authCookie) {
        TokenStorage.store(authCookie);
        delete $cookies\['AUTH-TOKEN'\];
    }
    $http.get('/api/user/current').success(function (user) {
        if (user.username) {
            $rootScope.authenticated = true;
            $scope.username = user.username;

            // For display purposes only
            $scope.token = JSON.parse(atob(
                TokenStorage.retrieve().split('.')\[0\]));
        }
    });
};
The placement of the custom HTTP header is handled in a the same http interceptor as last time. The actual "Login with Facebook" button is just a link to trigger the whole redirect frenzy:
<a href="/auth/facebook"><button>Login with Facebook</button></a>
To check if the actual Facebook API works, I've included another button to display the user details from facebook after login.
Final words (of advice)
It's been quite a ride to integrate my custom version of JWT with social authentication. Some parts were less than trivial. Like finding a good balance between offloading database calls to JWT tokens. Ultimately I choose not to share facebook's access token with the client as it's only needed when using Facebook's API. This means that any query to Facebook requires a database call to fetch the token. In fact it means that any REST API call to any controller that has an @Autowired Facebook service results in an eagerly fetched access token as part of the request-scoped bean creation. This is however easily mitigated by using a dedicated controller for facebook calls, but definitely something to be aware of. If you plan on actually using this code and making Facebook API calls, make sure your JWT token expires before the facebook token does (currently valid for 60ish days). Better yet implement a forced re-login when you detect a failure as any re-login will automatically store the newly acquired facebook token in the database.
You can find a complete working example at github. Details on how to run it can be found there as well. I've included both maven and gradle build files.
