Setting up Azure Devops Pipelines for your Kotlin projects
Azure DevOps seems to be getting quite popular. All .NET projects I have worked on last couple of years use it, which is quite understandable since it is made and maintained by Microsoft. But also in the world of Java/Kotlin, Azure DevOps is becoming an excellent choice. Maybe Microsoft loves Java after all! A DevOps service isn’t a DevOps service without some solid CI/CD tooling. Azure DevOps’s CI/CD tooling is called Azure Pipelines. So how do you set up an Azure Pipeline for your Kotlin project? Fortunately, its quite simple.
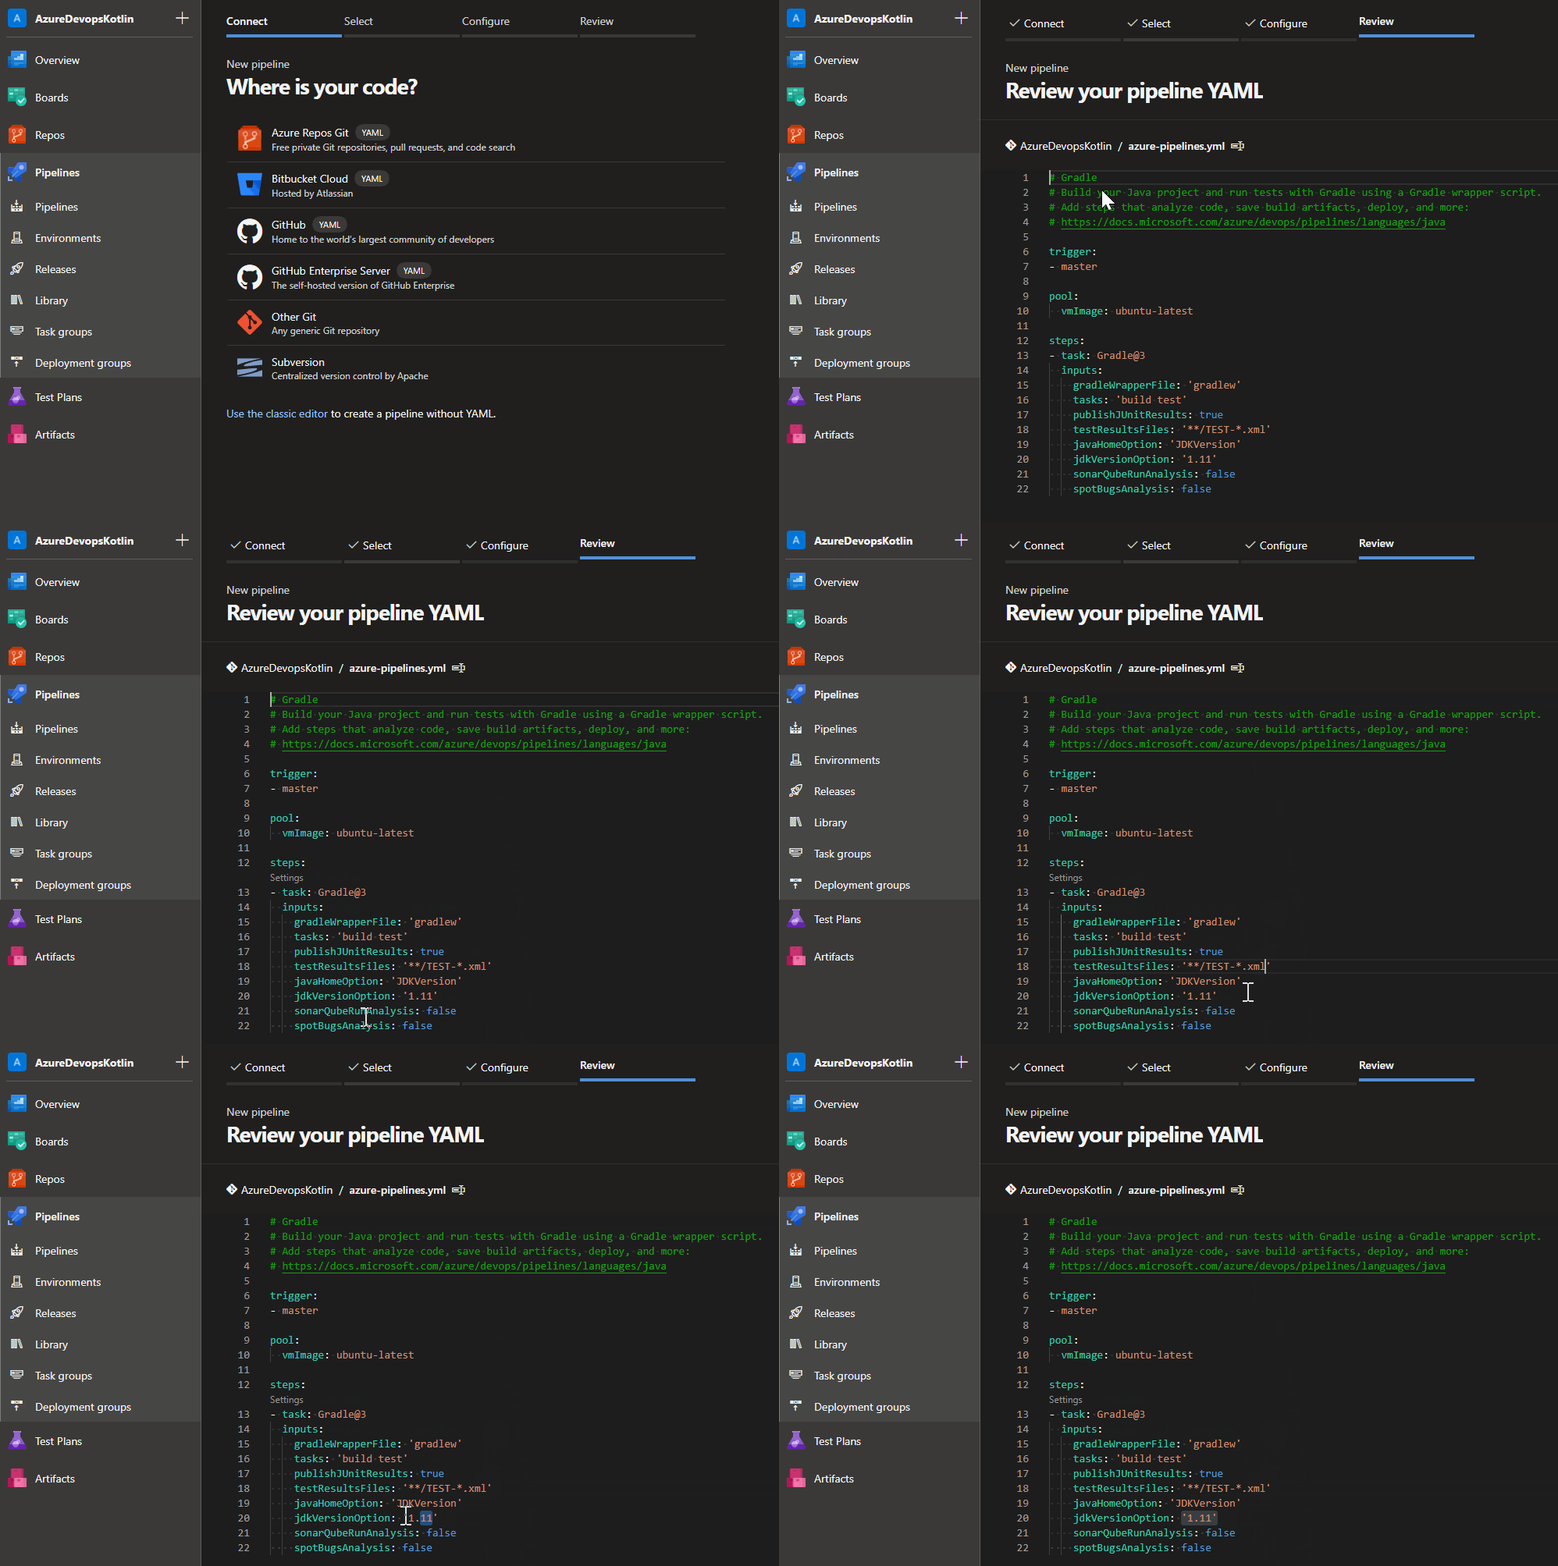
To create a new pipeline for your project all you need to do is navigate to Pipelines (on the left side menu of your Azure DevOps dashboard) and click on the 'Create Pipeline' button in the middle of the screen.
If you already have a pipeline, there will be a 'New Pipeline' button on the top right.
First you have to choose where your repository lives.
I have a demo Kotlin project with a couple of unit tests hosted within Azure DevOps itself.
When you click on 'Azure Repos Git` you will be able to select your repo.
Afterwards Azure Pipelines will scan your project structure and create a yaml file which you can review.
Pretty easy stuff eh.
Since my demo project is using Gradle it will automatically add a Gradle@3 task.
If I was using Maven, it would have added a Maven@3 task.

Personally I like the GUI to create boilerplate pipelines.
But of course you can always just create the pipeline yaml files yourself and commit them to a branch (or directly to the main branch).
Then, when creating a pipeline in Azure DevOps under Configure, you can click on Existing Azure Pipelines YAML file and select your committed file.
Anyhow, the generated (or self made) yaml file will look something like this.
trigger:
- master

pool:
  vmImage: ubuntu-latest

steps:
- task: Gradle@3
  inputs:
    gradleWrapperFile: 'gradlew'
    tasks: 'build test'
    publishJUnitResults: true
    testResultsFiles: '**/TEST-*.xml'
    javaHomeOption: 'JDKVersion'
    jdkVersionOption: '1.11'
    sonarQubeRunAnalysis: false
    spotBugsAnalysis: false
Most inputs are quite self explenatory.
Unfortunately there is one caveat at the moment.
The Gradle task does not support Java 17 out of the box.
The previous LTS version (1.11) is the newest out of the box supported version.
If you want to use older versions you can change the jdkVersionOption to your desired supported version (1.11, 1.10, 1.9, 1.8, 1.7, 1.6).
For newer LTS versions, you could wait for Microsoft to add support for it (and maybe by the time you are reading this, they already have).
In case you need to use a non-out-of-the-box supported Java version you have a couple of options. You could use the batch script task to install Java on the build agent.
Or you could use the Java Tool Installer Task to install the Java version you need. The implementation looks like this:
- task: JavaToolInstaller@0
  inputs:
    versionSpec: '16'
    jdkArchitectureOption: x64
    jdkSourceOption: 'AzureStorage'
    azureResourceManagerEndpoint: Azure Resource Manager
    azureStorageAccountName: your_azure_blob_storage_name
    azureContainerName: jdks
    azureCommonVirtualFile: 'openjdk.zip'
    jdkDestinationDirectory: '$(agent.toolsDirectory)/jdk16'
    cleanDestinationDirectory: true
This will install a jdk hosted on your own Azure blob storage in a directory of your choosing (for example $(agent.toolsDirectory)/jdk16) and set JAVA_HOME to it.
Then your Gradle task should work with the installed jdk. Just make sure to change your jdkVersionOption.
Another way is to just pull a container image in your build agent and continue the build there.
You can do that using the container job.
trigger:
- master

pool:
  vmImage: ubuntu-latest

container: gradle:jdk16

steps:
- task: Gradle@3
  inputs:
    gradleWrapperFile: 'gradlew'
    tasks: 'build test'
    publishJUnitResults: true
    testResultsFiles: '**/TEST-*.xml'
    javaHomeOption: 'path'
    jdkDirectory: 'path_to_jdk16'
    sonarQubeRunAnalysis: false
    spotBugsAnalysis: false
Most important here is to change the javaHomeOption to path and change the jdkDirectory to the directory where the container has the jdk installed.
Maven
Of course your project might use Maven instead of Gradle. Fortunately there is also a Maven task for azure pipelines. It is very similar to the Gradle task, and it even supports Java 17 out of the box in contrast to the Gradle task.
- task: Maven@3
  inputs:
    mavenPomFile: 'pom.xml'
    javaHomeOption: 'JDKVersion'
    jdkVersionOption: '1.17'
    jdkArchitectureOption: 'x64'
    publishJUnitResults: true
    testResultsFiles: '**/TEST-*.xml'
    goals: 'package'
Pretty easy stuff eh! If you want to use unsupported Java versions, you can use the tricks shown above for Gradle.
Saving and Running your pipeline
Finally you can click on Save and afterwards on Run (or Save & Run) to run your pipeline.
When you press Save, Azure Devops will ask your confirmation and afterwards commit the generated yaml file to the main branch, in your project’s root folder.
Furthermore if you set your trigger to master, this pipeline will run every time something is merged into the main branch.
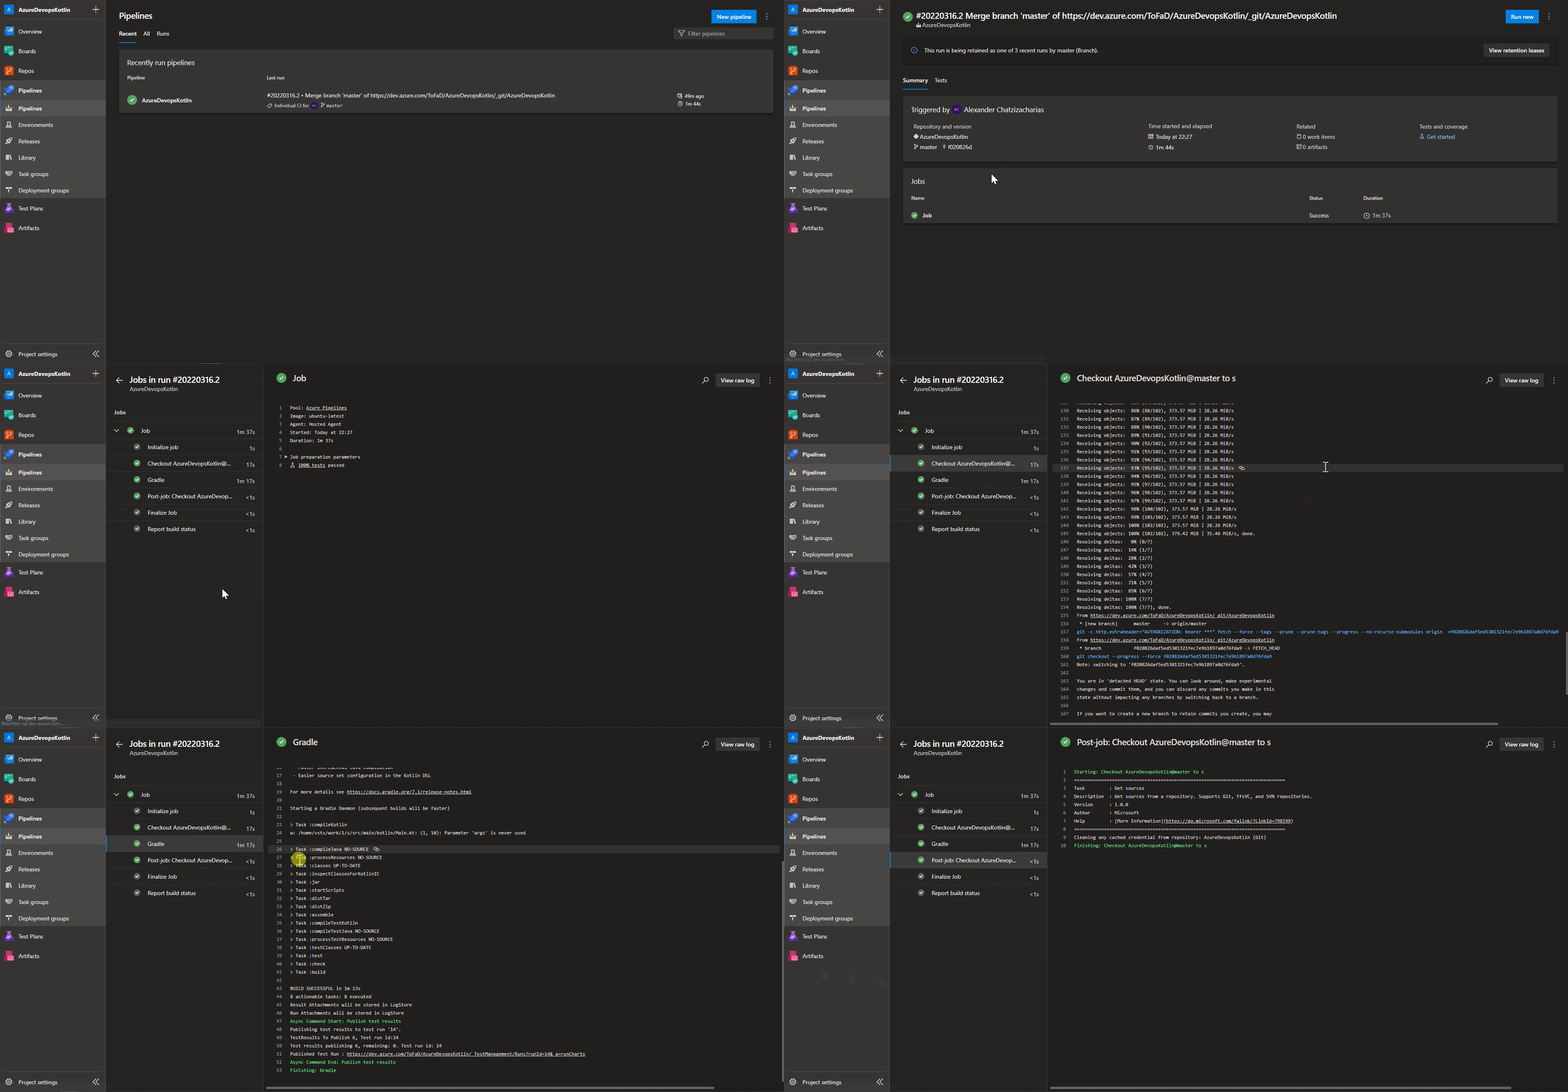
Once you press Run, you can navigate to your Pipelines and see it’s status.

You can click on the Pipeline to edit it or inspect it.
Once you open it, you can see exactly which steps and tasks the pipeline executed.
If the pipeline failed, you can also see exactly where and why it failed.
On a succeeded run, the test report will be available under Test Plans > Runs.
There you can select the latest test run and view your test results.
It’s a neat GUI where you can individually inspect your tests and see their duration.
In case the tests contain any failures, it will also show you why they failed.
In Conclusion
Fortunately Microsoft hasn’t made it too hard for us to create CI/CD pipelines for our Kotlin (or Java) projects. It is a little bit unfortunate that they don’t support all jdk versions out of the box in their tasks, but it isn’t too complicated to make them work with any version we wish.
Alright, that is all for now. Good luck and have fun people!
