Securing Spring Microservices with Keycloak – Part 2
In the first part we setup a local Keycloak instance. In this blog we will see how we can leverage Keycloak to secure our frontend. For this purpose we will create a small Spring Boot application that will serve a webpage. The next and last blog will show how authentication can be used between services.
Architecture overview
As mentioned we will create a small Spring Boot microservice and secure it using Spring Security and Keycloak. The service that we will create in this blog is the "frontend" Spring Service. It serves a simple web page that displays a hello message including the users email adres as registered in Keycloak. The next blog we will build the service and propagate the authorization from to frontend to service we cal. This way we build a complete Single Sign-On solution.

The Frontend service
Create a project
We start by creating a new Spring project using cURL.
curl -s start.spring.io/starter.tgz \
  -d type=gradle-project \
  -d groupId=net.vanweenen.keycloak \
  -d artifactId=frontend \
  -d language=java \
  -d dependencies=web,thymeleaf,keycloak,security \
  -d baseDir=keycloak-frontend | tar -xzvf -
keycloak dependency
By using the above project generation we have automatically added the Keycloak and Spring Security dependencies. You can look them up in the build.gradle file. However for the purpose of this blog we will be using Keycloak 4.4.0 that was released on 6 September 2018.
ext {
	keycloakVersion = '4.4.0.Final'
}
Property Configuration
Next we need to configure where the Keycloak instance we started is located and what realm and client we use. Also we configure our frontend to run on port 8081 because Keycloak itself is already running on 8080. In the first blog we configured http://localhost:8081 as a valid redirect url in the login-app client. We can’t use the Keycloak login page from any other location. Lastly we enable the logging for Keycloak so we can see what it happens internally.
server.port=8081

keycloak.auth-server-url=http://localhost:8080/auth
keycloak.realm=springservice
keycloak.resource=login-app
keycloak.public-client=true

logging.level.org.keycloak=TRACE
Java configuration
After configuring the the Keycloak adapter we need to configure Spring Security to use the adapter. We also need to configure our security rules. To do that create a SecurityConfig class. In here we configure Spring security to use Keycloak. This is done by setting the authenticationProvider on the AuthenticationManagerBuilder . For public or confidential applications we need to use a session authentication strategy applications so we can redirect to Keycloak. For bearer-only applications (typically api backend services) we provide a NullAuthenticatedSessionStrategy. Next we configure our websecurity to authorize requests to the /greetings endpoint for any user with the USER role. Spring Security prefixes the role name with ROLE_ . That is the reason we created the ROLE_USER role when configured Keycloak in part 1. Lastly we make our Keycloak Adapter Spring Boot aware. This way it won’t look for a keycloak.json configuration file but uses the adapter configuration.
@KeycloakConfiguration
public class SecurityConfig extends KeycloakWebSecurityConfigurerAdapter
{
    /**
     * Registers the KeycloakAuthenticationProvider with the authentication manager.
     */
    @Autowired
    public void configureGlobal(AuthenticationManagerBuilder auth) throws Exception {
        auth.authenticationProvider(keycloakAuthenticationProvider());
    }

    /**
     * Defines the session authentication strategy.
     */
    @Bean
    @Override
    protected SessionAuthenticationStrategy sessionAuthenticationStrategy() {
        return new RegisterSessionAuthenticationStrategy(new SessionRegistryImpl());
    }

    @Override
    protected void configure(HttpSecurity http) throws Exception
    {
        super.configure(http);
        http
                .authorizeRequests()
                .antMatchers("/greetings*").hasRole("USER")
                .anyRequest().denyAll();
    }

    // Spring boot integration
    @Bean
    public KeycloakConfigResolver KeycloakConfigResolver() {
        return new KeycloakSpringBootConfigResolver();
    }
}
Avoid double Filter bean registration
Spring Boot attempts to eagerly register filter beans with the web application context. Therefore, when running the Keycloak Spring Security adapter in a Spring Boot environment, it may be necessary to add `FilterRegistrationBean`s to your security configuration to prevent the Keycloak filters from being registered twice.
@KeycloakConfiguration
public class SecurityConfig extends KeycloakWebSecurityConfigurerAdapter
{
    ...

    @Bean
    public FilterRegistrationBean keycloakAuthenticationProcessingFilterRegistrationBean(
            KeycloakAuthenticationProcessingFilter filter) {
        FilterRegistrationBean registrationBean = new FilterRegistrationBean(filter);
        registrationBean.setEnabled(false);
        return registrationBean;
    }

    @Bean
    public FilterRegistrationBean keycloakPreAuthActionsFilterRegistrationBean(
            KeycloakPreAuthActionsFilter filter) {
        FilterRegistrationBean registrationBean = new FilterRegistrationBean(filter);
        registrationBean.setEnabled(false);
        return registrationBean;
    }

    @Bean
    public FilterRegistrationBean keycloakAuthenticatedActionsFilterBean(
            KeycloakAuthenticatedActionsFilter filter) {
        FilterRegistrationBean registrationBean = new FilterRegistrationBean(filter);
        registrationBean.setEnabled(false);
        return registrationBean;
    }

    @Bean
    public FilterRegistrationBean keycloakSecurityContextRequestFilterBean(
            KeycloakSecurityContextRequestFilter filter) {
        FilterRegistrationBean registrationBean = new FilterRegistrationBean(filter);
        registrationBean.setEnabled(false);
        return registrationBean;
    }
    ...
}
The web page
We configured that users with the USER role should be allowed to access the /greetings endpoint. So now we need to provide a simpel page. Create a GreetingController that provides a GetMapping. Let Spring inject a Model and an Authentication. In the model we can put information needed to render the page. The Authentication can be used to get user information.
@Validated
@Controller
public class GreetingController {

    @GetMapping("/greetings")
    public String greeting(@NotNull Model model, @NotNull Authentication auth) {
        String email = ((SimpleKeycloakAccount) auth.getDetails())
                .getKeycloakSecurityContext()
                .getToken()
                .getEmail();

        model.addAttribute("name", email);
        return "greetings";
    }

}
This controller will add the email adres of the user to the model under the "name" attribute and render the page. The page is defined in the resources/templates folder and takes the name of the return value. In this case it will be greetings.html. It contains the following contents:
<!DOCTYPE HTML>
<html xmlns:th="http://www.thymeleaf.org">
<head>
    <meta http-equiv="Content-Type" content="text/html; charset=UTF-8"/>
</head>
<body>
    <h1 th:text="'Hello, world! from ' + ${name}"/>
</body>
</html>
Visiting the site
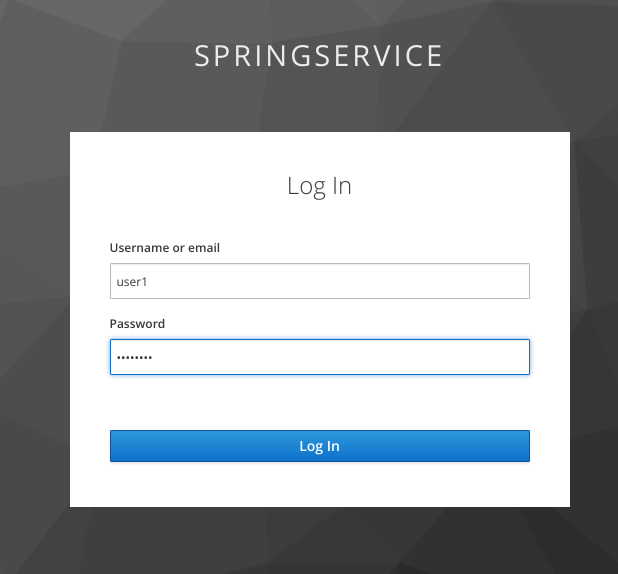
Finally we can see that our page is successfully secured by http://localhost:8081/greetings. We should be redirected to the Keycloak Login page. Login with the following credentials that we used in part 1:
Username: user1
Password: ooR9ooha
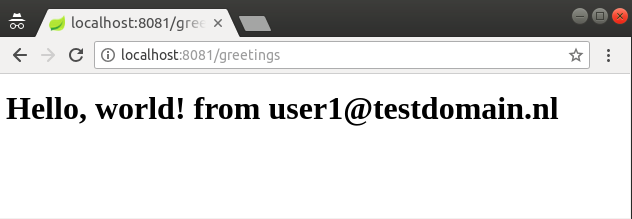
If the login was successful then we are redirected back to frontend which should now display our page:
Accessing protected API’s protected by Keycloak
Next blog we will see how we can secure our backend API services with Keycloak and use the login token to access a service.
